
Win Hill - Peak District Walk
Saturday 12th January 2008
This was forecast as the only dry day of the weekend so we made the most of the break in the rain and headed for Hope in order to try out a new route (for us) onto Win Hill. The wide-angle lens was in use again today and I'm starting to get to grips with it, although today wasn't the greatest day for taking photos.
Start: Hope car park (SK 2622 74701)
Route: Hope car park - Win Hill (TP) - Hope Cross - Jaggers Clough - Nether Booth - Hollins Cross - Back Tor - Lose Hill - Hope car park
Distance: 10.5 miles Ascent: 694 metres Time Taken: 5 hours 35 mins
Terrain: Good paths, muddy in places.
Weather: Cold and grey.
Pub Visited: None Ale Drunk: None

The first view of Mam Tor as we rest after a steep climb just above Twitchill Farm.

Looking along Hope Valley towards Offerton Moor as we continue to climb up to Win Hill.

Approaching Win Hill's summit.

Win Hill's trig.

Crook Hill across Ladybower Reservoir.

Snow on Stanage Edge.

The sun catches Lose Hill as we head across Hope Brink.

Plenty of snow on Kinder Scout. As we walked along Hope Brink we could see and hear the Edale Mountain Rescue teams heading towards Edale, the slippery conditions kept them busy as they had two rescues to deal with that day.

The Vale of Edale from Hope Brink.

Looking back to Hope Brink as we head down towards Jaggers Clough.

The ford at the bottom of Jaggers Clough, too deep to walk across today.

A brief glimpse of sunshine as it catches Hope Brink.

Lose Hill and Back Tor.

Looking towards Kinder Scout from the path above Nether Booth Farm.
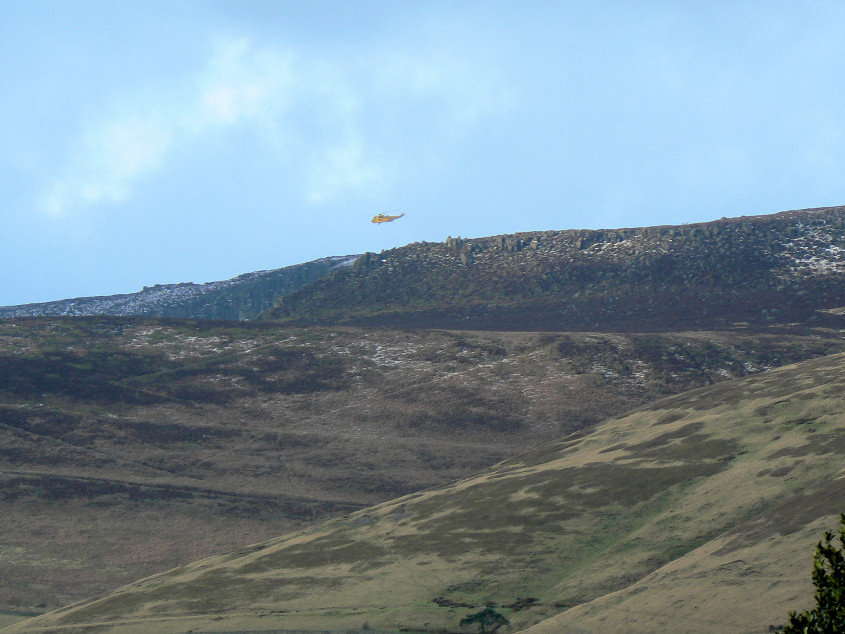
Zooming in on the helicopter coming to help out with the first of the two Mountain Rescue incidents of the day.

Back Tor and Lose Hill.

Hollins Cross.

Looking across the Vale of Edale towards the Kinder Plateau from Hollins Cross.

A close-up of Grindslow Knoll.

The path to Back Tor and Lose Hill. It was very slippery along here today.

Mam Tor, Rushup Edge and the Vale of Edale from just below the summit of Lose Hill.

John, Win Hill and the Hope Valley from Lose Hill.
All pictures copyright © Peak Walker 2006-2023